I need to work on organizing my crafts... why - because they are all over my living room.
The perfect corner would actually be where my dining room table sits at the moment. No one uses it. We don't eat at it anymore... since it's crammed in a tight corner. And Paul isn't home... sitting at a table alone can feel lonely. So I don't use it for anything but opening the mail.
At the moment my non-yarn related craft tools are in small boxes, shopping bags, or ziplocks thrown about our overflow closet. It's hard to find things, and honestly, this closet is a mess as it is. That needs it's own organizational blog... and pictures. (Be afraid).
So I'm trying to think of ideas. I live in a 1 bedroom apartment. Each corner of the space is occupied with furniture, plants, or electronics. So I figure I need to play with what I have while only adding a few frugal pieces of organization. It needs to be beautiful and functional.
So here is my table in the corner:

Here is my basket of yarn:

My yarn can sit in the basket... it's cozy there. It's also a good way to tell me to stop! When that basket is full, my trips to the craft store are few... because I have enough to work with. It's the perfect size.
What needs organization is the scissors, needles, hooks, fabric glue, fabric, sewing machine, craft paper, paints, exacto knife, and glue gun. So it's time to think.
I came up with 2 ideas:
The 1st was to purchase a small side table like this from
Ikea for $30. The shelf at the bottom can hold my basket of yarn and above can sit a decorative box with all my other goodies. But it seemed like a lot of money to spend on a table that wont be useful for anything else and doesn't even match my living room.

So Idea #2 was to use that dining room table. My yarn basket can sit by the couch and wonder about the rooms I'm crocheting in as it always has, but those other pieces of goodies can sit a top the table... in boxes, organized, nice, neat and out of the way. Baskets... boxes... for under $10 would do the trick.

Hiding... in plain sight

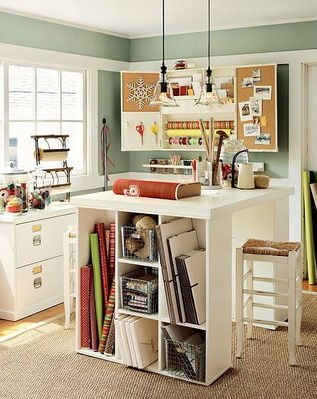
Then one day - when we have the room - I'll have a craft room... and maybe it can look something like this:

I love the space, the organization, the crafts and computer all in one place. I hate... the color.
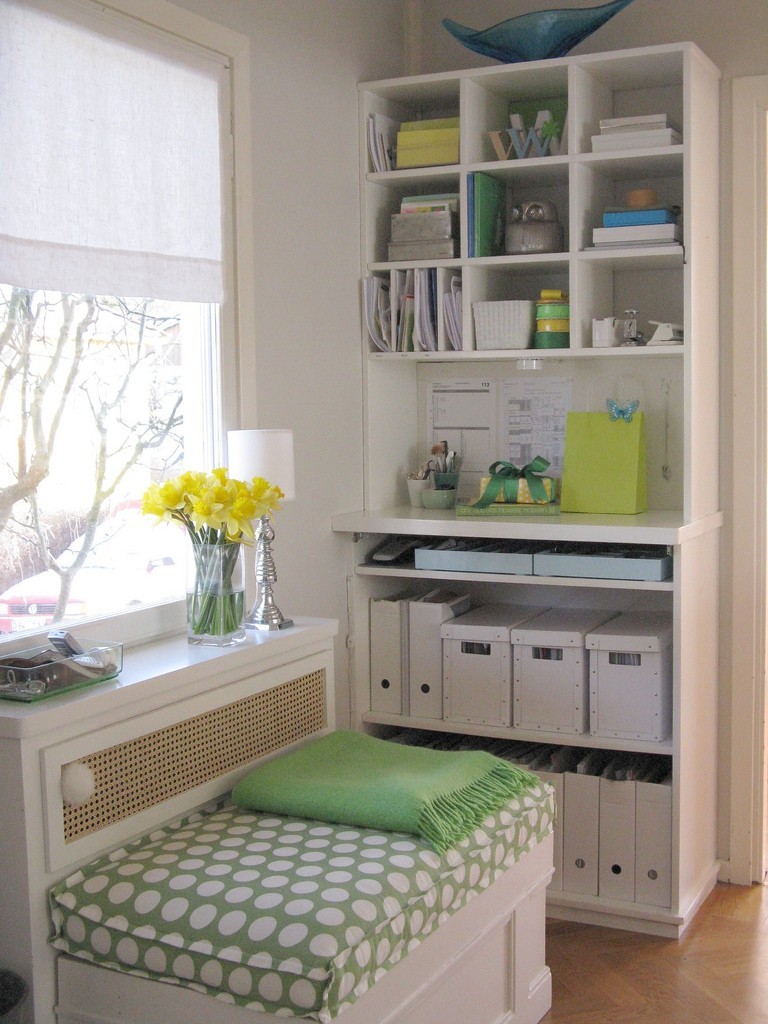
I love the light, the brightness, the organization, the height, the use of this little corner, the color... I would want a spot for a computer (for pictures & research & printing)
I love the light, the brightness, the sitting area, the organization and fresh flowers
What I envision is a small room with lots of natural light, with a desk used as an office space. Where Paul and I can go online, do research, upload pictures and do some office work. In that same room, I picture shelves, filled with baskets of yarn, fabric, paints and crafts materials. I picture boxes, filled with paper work, craft paper, and other paper products, and jars filled with buttons, paint brushes, hooks, scissors, etc... I picture sage green or light yellow walls, a comfortable love seat or extra large chair, a stereo with great music, and scented beeswax candles.
That would be my perfect room... a room to retreat in. A room to relax in. A room to feel organized in. A room to share.
What do you say Paul? Can we turn our home office into an office/craft center?
 My dining room table with basket of yarn, boxes of junk and some projects - at least they are in 1 place
 I used a small yellow flower pot to hold my hooks, needles and scissors
 This is the good ole basket of yarn
 And here is what needs a nice organized pretty box to hide, my ribbon, sewing stuff, paints, brushes, glue gun, glue sticks, fabric glue, etc...
 And here are 2 bags of old WIPs finally finished. My headbands are pretty much done. I have 3 left that are WIPs but I needed a break. One pattern for too long gets boring.
 Here is the project at the moment.
 Here it is up close. It's basically 1/2 double crochets
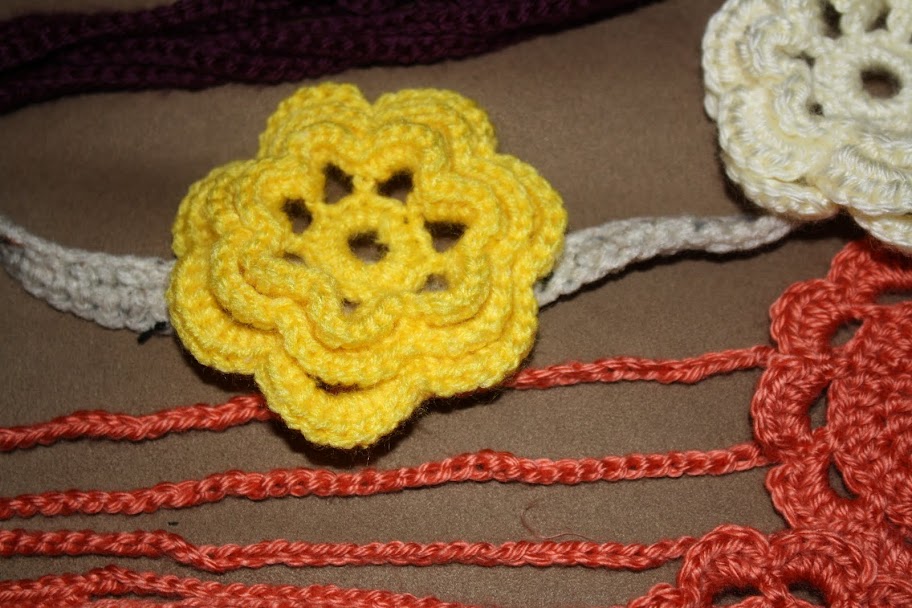
 Here is a photo of the book's picture. I'm going to attach the flower and not the ribbon to mine. I chose my own colors and type of yarn as well.
 Here is a close up of both versions
 And here is a last picture... I hope it comes out at least close


